Patricia
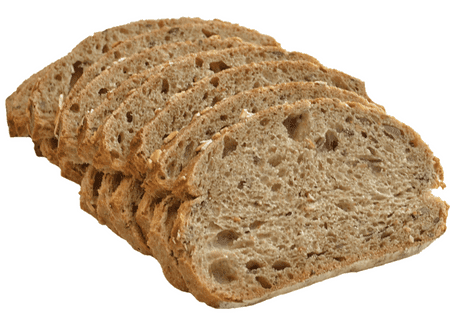
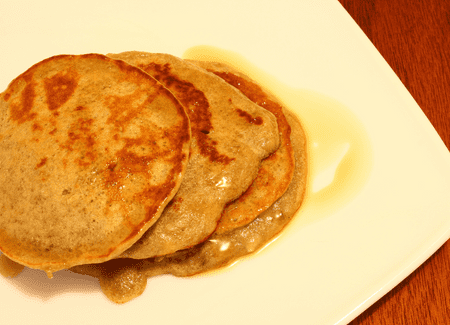
Non Refined Bread
Is non-refined bread the healthiest bread you can make? To answer that question, let’s look at the different healthy bread options available.
There are dozens of varieties of bakery products available at grocery stores and supermarkets. Some are better for you than others.
Some types of breads are high in fiber, nutrients, and minerals, while some are made from refined grains.
You might be wondering which type of bread is best for you.
In this article we will discuss the benefits of whole grain breads, as well as the pros and cons of white flour breads. There’s also instructions on how to make healthy bread of each.
Each of Us Need a Healthy Diet
Healthy diets include foods that provide us with the necessary nutrients our bodies need to function properly.
These foods should also not contain harmful substances such as pesticides, hormones, antibiotics, or genetically modified organisms.
Healthy diets also include plenty of fruits, vegetables, lean meats, fish, nuts, seeds, legumes, and whole grains.
I really enjoy a tasty bread.
Whole Grain Breads are Typically Better Than White Flour Breads
When it comes to choosing between white flour and whole wheat bread, there are many advantages to eating whole grain breads.
For starters, they’re higher in fiber, lower in calories, and less likely to cause digestive issues.
They also tend to taste much better than their white flour counterparts.
White flour breads are typically made from refined grains. These grains are stripped of most of their bran and germ, leaving them with only the starchy endosperm.
Refining removes almost all of the dietary fiber found in whole grains. This makes them easier to digest and absorb.
White flour breads also tend to be higher in sugar and sodium. They’re often loaded with preservatives and other additives.
On top of that, white flour breads are usually very low in antioxidants. Antioxidants help protect cells against damage caused by free radicals. Free radicals can cause cancer, cardiovascular diseases, and premature aging. Antioxidants can also prevent cell damage when taken internally.
So if you want to eat healthier, opt for whole grain breads instead of white flour breads!
Whole Grain Bread Benefits
Whole wheat bread has more fiber, vitamins, minerals, antioxidants, and other important nutrients than refined bread.
It also contains a higher amount of protein, iron, calcium, zinc, magnesium, phosphorus, potassium, and selenium.
The most important benefit of eating whole grain bread is that it helps to lower your risk of heart disease.
A study published by Harvard School of Public Health found that people who eat whole grain bread have a 30 percent reduced chance of dying from heart disease compared to those who don’t eat any whole grain bread.
This is because whole grain bread contains fiber, which lowers cholesterol levels.
Fiber also improves digestion and prevents constipation. It also reduces blood sugar spikes after meals.
Furthermore, whole grain breads are rich in B-vitamins, which help with energy production and metabolism.
B-vitamins are essential for healthy skin, hair, nails, and bones. They also keep your immune system strong.
White Flour Bread Pros & Cons
White flour bread is made from refined grains. This means that they have been stripped of their bran and germ.
They are also bleached or chemically treated to remove color and flavor.
Refined grains contain less fiber, vitamins, minerals and antioxidants than whole grain bread.
They also contain fewer nutrients than whole grain bread. The main problem with white flour bread is that it causes digestive problems.
Symptoms of Eating Too Much Refined Bread
When you eat too much refined bread, it can cause digestive issues such as bloating, gas, cramps, diarrhea, and even stomach ulcers.
If you want to avoid these symptoms, try making homemade bread using whole grain flour instead of white flour.
Here’s some simple bread recipes that are quick to make…
1. Homemade Whole Wheat Bread Recipe
Making whole wheat bread is easy. You just need to follow a few simple steps.
1 cup warm water (110 degrees F)
2 tablespoons yeast
3 cups whole wheat flour
1/4 teaspoon salt
2 teaspoons olive oil
Mix all ingredients together until dough forms. Let sit 10 minutes. Knead dough 5 times on a floured surface. Place dough in an oiled bowl and let rise until double in size. Punch down and shape into loaf. Bake at 350 degrees F for 45 minutes.
2. Non-Refined Bread Recipe
Bread is one of the most important foods we eat. It’s not just something to snack on between meals. It should be eaten as a meal itself.
Non-refined bread is a healthy alternative to white bread. It has more fiber and less fat.
You can find non-refined bread in health food stores. If you’d rather make your own, follow these steps :
Mix 3 parts whole wheat flour with 1 part brown rice flour.
Add 1 teaspoon baking soda, ½ teaspoon salt, ¼ teaspoon cinnamon, and a few drops of vanilla extract. Mix all ingredients together.
Pour the batter onto a greased cookie sheet. Bake at 350 degrees F for 15 minutes. Remove from oven and cool completely. Cut into slices.
You can add nuts, raisins, chocolate chips, etc., to the dough.
3. Non-Refined White Bread Recipe
As mentioned above, white bread is usually made from refined flour. That means that it’s stripped of its nutrients.
To make non-refined white bread, use unbleached flour instead of bleached flour. Unbleached flour is simply flour without any chemicals added to it.
Unbleached flour is available in health food stores.
You’ll need 2 cups of flour for every cup of water.
Mix the flour with enough water until a soft dough forms. Knead the dough for 10 minutes.
Cover the dough with plastic wrap and let it rise for 45 minutes. Punch down the dough and knead again for 10 minutes.
Divide the dough into 4 equal pieces. Roll each piece out into a long rectangle. Fold the dough over once so that the seam side is facing down.
Roll the dough out again into a long rectangle. Cover the dough with plastic wrap. Let it rest for 20 minutes.
Repeat the rolling and folding process twice more. The final dough will look like a large square.
Let the dough rise for 40 minutes. Punch down the risen dough and divide it into 12 equal pieces. Shape each piece into a ball. Place them on a greased cookie sheet about 2 inches apart.
Let the loaves rise for 60 minutes. Preheat the oven to 450 degrees F.
Bake the loaves for 25 minutes. Cool completely before slicing.
4. Gluten Free Bread Recipe
If you want to make gluten free bread, use the non-refined white bread recipe and replace the regular flour with corn starch.
Recommended Reading
We recommend reading “Eat Right For Your Blood Type” by Dr. Peter J. D’Adamo. He explains how to choose the right diet based on your blood type.
We are not giving medical advice and recommend that if you need advice, check out the book and talk to your medical expert.
There are four different types of blood: A, B, AB and O.
Each one has its own unique nutritional needs, for example:
A blood type may have an increased risk of heart disease because they tend to eat more meat and dairy products.
B blood type may have a higher risk of cancer because their body produces too much estrogen.
AB blood type may have a lower risk of diabetes because they produce less insulin.
O+ blood types may need a high intake of vitamin C, omega 3 fatty acids, and iron.
O- blood types may require a lot of protein, vitamin B12, and folate.
AB+ blood types may require a lot more vitamin B6 and magnesium.
Why these differences exist is because every person ’s body reacts differently to certain foods. This is important is because all these blood types have different enzyme systems.
If you don’t get enough of these vitamins and minerals, then your body won’t work correctly.
This could lead to problems like fatigue, headaches, skin rashes, depression, and even heart disease.
Eating healthier may help your life overall.
Easy and Healthy Apple Cake without Refined Sugars
Apples are loaded with vitamins, fiber, and antioxidants. Apples offer great health advantages, especially for lowering your risk of various chronic diseases.
If you’re feeling hungry late at night and want some dessert but don’t want to eat cake, then you might be tempted by something else. This healthy apple cake is the solution!
Apple cake recipes made from scratch are a must for me. They’re so delicious, nutritious, and easy to prepare. Plus they taste so much better than boxed cakes and sugary cakes.
Simple Ingredients and a Few Minutes of Your Time
You’ll just need 10 ingredients and 15 minutes of your time to prepare this delicious cake. However, you’ll need to wait another 50 mins (40 mins baking time plus 10 mins of cooling time) before you can eat this wholesome dessert.
This easy-to-prepare apple cake is a low-calorie and low-fat dessert that requires no special equipment and takes just minutes to prepare. You don’t need any eggs, dairy or butter for this recipe. However, you would never know because it’s so moist, fluffy and tender on the outside.
There’s No Wheat Flour or Refined Sugar
This easy apple pie recipe uses rice flour instead of wheat flour, so it’s naturally free from any kind of allergens associated with wheat. By simply replacing the regular flour with rice flour, it makes this gluten free.
You may find this cake to be naturally sweeter than most apple cakes because it contains apples and chopped medjool date pieces. To top it off, I usually add a tablespoon of cinnamon and a pinch of nutmeg for a warming and spicier taste.
It’s not just delicious, but it’s also inexpensive.
Something our readers mentioned is that when you have made this apple cake, it’s very moist due to the apple chunks. Hint: a little vanilla ice cream (or ice cream substitute — even greek yogurt) can taste great with it!
It keeps well and fresh for up to four days if stored in an air-tight container. You can also freeze it: Wrap the whole thing in plastic wrap and then put it in an air-tight container. Freeze it for up to 1 month.
It’s my favorite! If you are interested in the full recipe keep reading…
Simply Tasty
You might have noticed that most of my recipes are very easy and healthy. They’re perfect for busy people who don’t have much time to cook — and who want to have more healthy choices. And this apple cake is no different. Combine the dry ingredients, then combine the wet ingredients and finally add the filling.
These are the steps I follow when making most of my cake recipes.


Apple Cake
There are 3 simple sets of Ingredients
1. Dry Ingredients
- 2 cups (200 gram) rice flour
- 1 tsp baking soda
- 1 tsp nutmeg
- 1 tbsp ground cinnamon
2. Wet Ingredients
- 1 1/2 cup of oat milk (or 1 1/2 cups of unsweetened almond milk)
- 1 tbsp rapeseed oil (or 1 tablespoon of melted coconut oil)
- 1 tbsp apple vinegar
3. Filling
- 4 pitted medjool dates
- 2 chopped apples
- 1/3 cup chopped walnuts
Instructions
- Preheat the oven to 350°F. Grease a baking sheet with rapeseed oil, or the coconut oil or line with greaseproof paper.
- Mix the (1) dry ingredients together in a large bowl.
- Combine the (2) wet mixture together in a blender and blend until it’s well mixed.
- Add the (2) wet ingredients into the (1) dry ingredients and stir until they’re well combined. Then add the chopped apples and walnuts and dates.
- Put this dough into the cake pan and place it in the oven to cook for 40 minutes. It’s done when golden brown. Remove from the oven and let the filled pan cool down. After the cake has cooled down for 10 minutes, remove it from the baking pan.
This healthy cake is best served freshly baked. After cooling in the baking pan, transfer it to a serving platter and serve immediately — or put it on a wire rack and let it cool completely before serving.
Supplies Needed:
blender
cake pan or form

Want more healthy cake recipe ideas?
If you looking for more wholesome cake ideas check out my other variations like this no bake raspberry cheesecake. Or when you are looking for a fruity strawberry jam check out this recipe — and if you like something more chocolaty check out this smoothie with black beans. It may sound weird to you to add black beans to your smoothie, but I challenge you to try. You will not notice the bean taste but instead you’ll receive an extra portion of the nutritious legume.
Book // Vegan 100 by Gaz Oakley
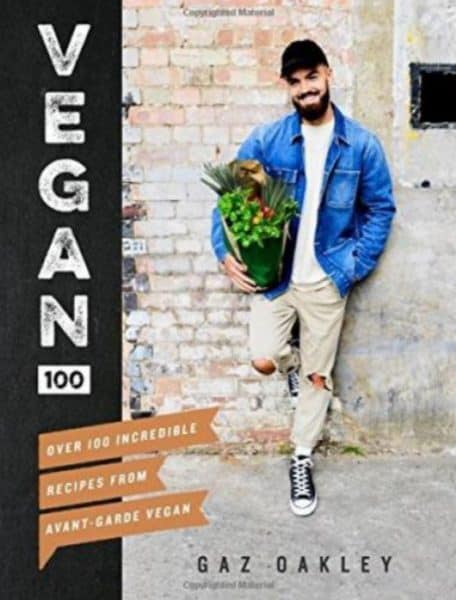
Vegan 100 by Gas Oakley
Through the guy who eats the most meat at my workplace, I met Gaz Oakley. Gaz made him appreciate vegan cuisine and that immediately caught my eye!
Gaz is a very skilled chef who previously just broadcasted his amazing vegan recipes via YouTube.
Now, his long awaited (by me at least) cookbook has finally been released!
Gaz’s book is completely vegan and shows how vegan food doesn’ t have to be boring.
In my opinion he is the master of flavor but not all of his recipes are completely healthy, as vegan isn’t the same as healthy.
This is my vegan bible with the most innovative and outstanding vegan recipes I have seen.
Try his vegan bacon (coconut bacon), but be warned, it’s super addictive — and not so healthful — but who cares!
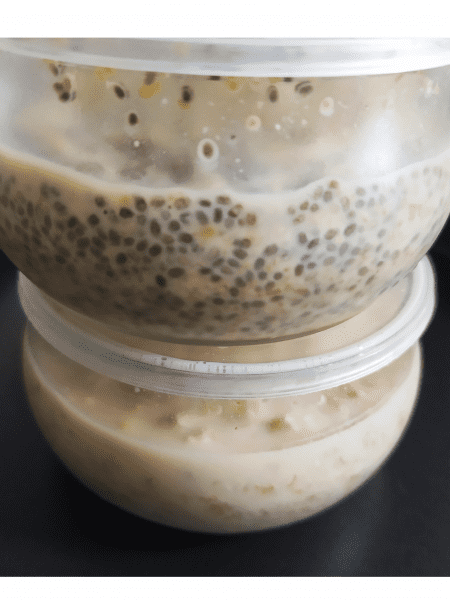
Strawberry Jam with Chia
This healthy strawberry jam recipe uses chia seeds to add protein and fiber without any added sugar. It’s also naturally sweetened and has a beautiful color! However, most importantly, this jam adds a delicious flavor to your favorite breakfast bowl (or slices of bread), or even on top of your breakfast pancake! Because chia seeds are so healthy for you, this jam is loaded with them. Chia seeds contain omega-3 fatty acids (healthy fats), protein, fiber, and antioxidants.
To make strawberry jam, you’ll use just two main ingredients: strawberries (or raspberries) and chia seeds. Also this recipe couldn’t be more simple, it’s done within 5 minutes and no stove is required. You could also add the juice of a squeeze lemon and some maple syrup if you want an extra bit of acidity and sweetness.
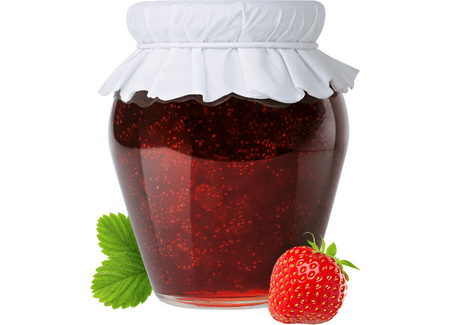
Strawberry jam with chia
A Simple Chia Jam
To make a Chia jam is really simple. All you need is five minutes of your time and then put the jam in the fridge overnight. For this Chia recipe we will first clean and puree the strawberries and then stir in the tablespoons of Chia. When you’re ready, put the chia seed mixture into the refrigerator overnight and then the next morning (six hours later), your delicious and healthy jam is ready.
Strawberry Chia Jam
Prep Time 5 mins + Cook Time 5 hrs + Total Time of 5 hrs 5 mins
Ingredients
- 2 1/2 cup (250 gr) mixed strawberries, puree
- 3 tbsp chia seeds
- halve a lemon, juice
- 1 tablespoon maple syrup, optional
Instructions
- Clean and puree the strawberries.
- Mix in the chia seeds, the lemon juice and maple syrup.
- Transfer the mixture to a jar and place in the fridge for at least 6 hours.
- Add the jam to your breakfast bowl, slice of bread or anything you like and enjoy!
Equipment Needed
immersion blender
Conclusion
I hope you liked this easy recipe and that you will try making it soon 🙂
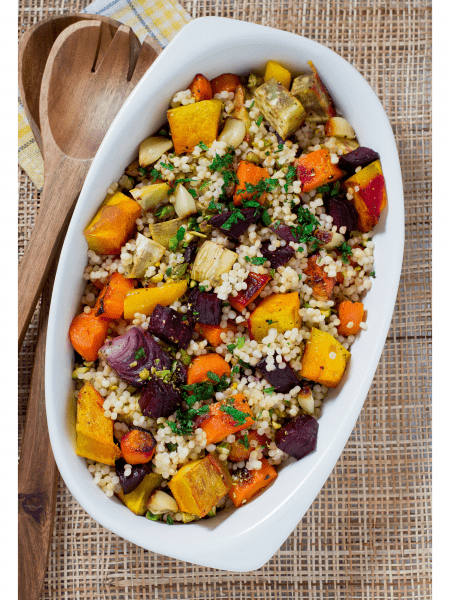
Red Rice Salad with Tofu and Apricots
Here’s a simple recipe for a sweet and spicy rice salad with tofu and apricots. You will need nine ingredients and within thirty minutes you’re ready to serve.
This healthy recipe for rice salad uses red rice. Red rice has similar nutritional values as brown rice. They’re full of fiber and contain plenty of nutrients. You can usually find red rice near the Himalayas and southern India. But I just found some at my local supermarket so I thought I’d give it a go.
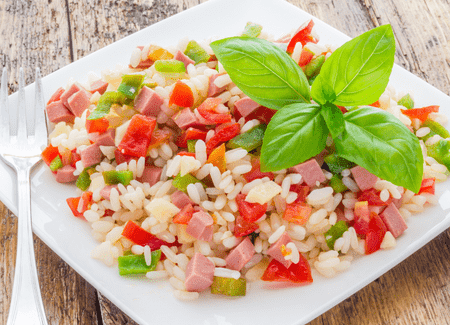
Red Rice Salad Recipe
For this quick and simple lunch or dinner recipe, we begin by cutting the apricot into small pieces. After that, put them into some lukewarm water with some raisins. Saute the red rice in a pan together with some olive oil, spring onions, and salt. Then we add some bouillon and cook the rice within 20 minutes ready.
You can toast some pine nuts during these 20 minutes, bake the tofu, and chop some fresh cilantro. Once everything has been prepared, you’re ready to serve your rice dish with baked tofu and dried fruit.
Rice with Tofu and Apricots
Prep Time 10 mins + Cook Time 20 mins = Total Time 30 mins
Ingredients
Rice Salad
- 1/3 cup (75 gram) dried apricots, welled
- 2 tbsp raisins, welled
- 2 spring onions, chopped
- 1 1/2 cup (300 gram) red rice
- 1 tsp cinnamon, ground
- half a bouillon cube, vegetable
- 1 1/2 cup (300 gram) tofu, cubes
Toppings
- 2 tbsp pine nuts, roasted
- 1/4 cup cilantro, chopped
Instructions
- Chop the apricots and leave together with the raisins in luke warm water for about 15 minutes.
- Clean and chop the spring onion. Sauté the spring onions with some olive oil in a skillet over middle high fire for 2-3 minutes. Continue by adding the rice, the cinnamon and a pinch of sea salt and sauté for an addition 2-3 minutes.
- In the meantime prepare the bouillon cube with 600ml boiling water. When the bouillon is ready add this to the skillet together with the welled raisins and apricots. Cook the rice in about 20 minutes ready.
- In a dry pan toast the pine nuts over middle high fire golden brown.
- After the pine nuts bake the tofu cubes with a tablespoon of olive oil over middle high fire.
- When the rice is ready stir in the baked tofu and serve with the toasted pine nuts and some chopped cilantro.
Equipment Needed
Two Skillets
Conclusion
This is a very simple dish but it tastes great! It’s also a good healthy alternative to pasta. You can make it as a side dish or even as a main course if you want.
Hope you enjoyed this recipe and I will see you next time 😉
Nutty Couscous Salad with Dried Apricots
This versatile couscous salad is made within 20 minutes with just 10-ingredients: whole wheat couscous, nuts, dried abricots, chickpeas and coconut flakes.
It’s also gluten free, vegan and super nutritious.
I love it as a side dish but it’s also great as a snack.
You can even add a little bit of olive oil and sprinkle with some sea salt.
And if you want to have a real treat, drizzle some honey on top.
Couscous Salad
Ingredients
250 grams (9 oz) whole wheat couscous
2 tablespoons sunflower seeds
3 tablespoons chopped almonds
1/2 cup dried chopped apricots
1/4 cup raisins
1/4 cup shredded unsweetened coconut
1/2 cup cooked chickpeas
1/2 cup fresh parsley, chopped
1/3 cup extra virgin olive oil
1/4 teaspoon cumin
Salt & pepper
Method
Cook the couscous according to package directions. Drain well and set aside.
In a large bowl, toss together the couscous, sunflower seeds, almonds, dried apricots, raisins, coconut and chickpeas.
Add the olive oil, cumin, salt and pepper. Mix well.
Serve immediately or refrigerate up to 2 days
Conclusion
A healthy and filling salad that tastes amazing. It’s simple to prepare and makes an ideal lunchbox meal.
NoRefined is a brand new channel where we share quick and easy recipes with a focus on gluten free and refined product free cooking.
We hope you’ll subscribe and stay tuned for more plant based, tasty videos and lots of inspiration.
Oatmilk
Does oatmilk taste good? Well, it does have a nutty flavor that’s similar to almond milk. However, unlike almond milk, oatmilk doesn’t contain any nuts. Oatmilk also contains more protein than almond milk. In fact, oatmilk contains almost twice as much protein compared to regular milk.
Ingredients
2 cups water
1 1/2 cups oats (soaked overnight)
3 tablespoons agave nectar
1 teaspoon vanilla extract
Instructions
Soak the oats overnight in cold water. Drain and rinse.
In a saucepan bring the water to boil.
Add the oats and reduce the heat to low.
Cook the oatmeal for 30 minutes.
Remove from the heat and let stand for 10 minutes.
Transfer the oatmeal into a blender and blend until smooth.
Strain through a fine mesh strainer. Discard the solids.
Pour the milk into a bowl and refrigerate until ready to use.
Conclusion
If you’re looking for a healthy alternative to dairy milk, this is your best bet. It tastes great and is packed full of nutrients. I highly recommend trying out this recipe.
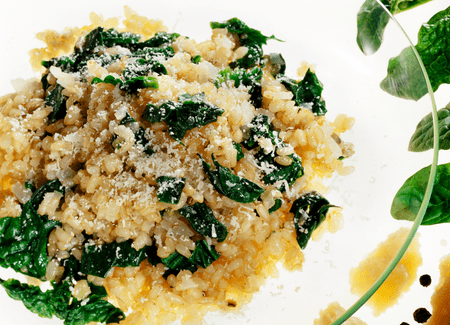
6 Ingredient Spinach Risotto
We had no idea that this vegan spinach risotto would be so popular! After a long day at work, the refrigerator was almost empty as the shelves were nearly bare. What I could collect was 6 ingredients which might be used to create a tasty risotto recipe: spinach (or any green vegetable), sun dried tomatoes, an onion, and nutritional yeast.
The next time I make this risotto recipe, I might add some Parmesan cheese instead. It would be even better if I could use nutritional yeast instead.
Spinach Risotto
6 Ingredient Spinach Risotto
Prep Time10 mins + Cook Time20 mins = Total Time of 30 mins
Ingredients
- 4 cups vegetable stock
- 1 cup arborio rice
- 1 large minced onion
- 15 sun dried chopped tomatoes
- 3 cups raw spinach
- 1/4 cup nutritional yeast or Parmesan cheese, plus extra to use as topping
Instructions
- Prepare and heat the vegetable stock.
- Place a large sauté pan over medium heat, add some oil and sauté the minced onion golden brown.
- Add the arborio rice to the pan, turn up the heat and sauté for an additional minute until the rice has become slightly translucent.
- Turn the heat to simmer and add the first cup of stock and a good pinch of sea salt. When the cup of stock has been absorbed add the next one until all stock is used and the arborio rice has cooked. This process will take up to 15 minutes.
- Continue by adding a cup of spinach at a time. When the spinach has shrunken in size add the next one.
- Remove the pot from the heat and finish by adding the chopped sun dried tomatoes plus nutritional yeast or Parmesan cheese, then stir well.
- Place a lit over the pot and steam for 2 minutes.
- Serve immediately and finish with some extra nutritional yeast or cheese. Enjoy!
Equipment Needed:
Pot
Conclusion
This risotto recipe is very easy to prepare. The only thing you need is a pot and a stove. You can find a lot of recipes on the internet about how to cook risotto but most of them are too complicated. If you follow my instructions, you’ll get a delicious risotto every time.
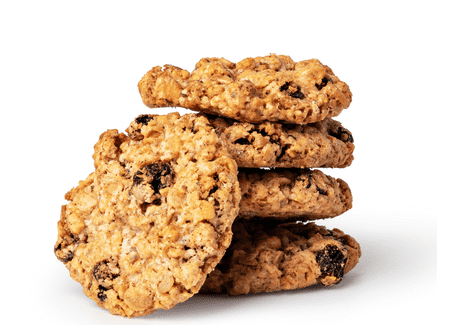
Peanut Butter Oatmeal Cookies
When I go to the gym or am about to get hungry, I really enjoy eating these vegan peanut butter cookies with bananas and raisin. They’re filled with nutrients and give you lots of energy for the rest of the day.
To make this healthy cookie recipe, simply combine the dry ingredients: oats, coconut blossom sugar (or brown sugar), baking powder, and a pinch of salt into one bowl. After combining the wet ingredients (bananas and peanut butter) in a food processor, blend them together until they’re smooth. Mix the wet mixture with the dry mixture by adding a handful of raisins and stirring until they’re well combined. Make 12 oatmeal cookies and put them in the oven for 25 minutes at 350 degrees Fahrenheit.
Interested in the full recipe of these oatmeal cookies? Scroll down!
Peanutbutter Oatmeal Cookies
Prep Time 10 mins + Cook Time 25 mins = Total Time 35 mins
Ingredients
Dry Ingredients
- 1 cup (200 gram) oatmeal, rolled
- 2 tbsp coconut blossom sugar, or more if you like to have them sweet
- 1 tsp baking powder
- a pinch of salt
Wet Ingredients
- 3 bananas, overripe
- 4 tbsp peanut butter
Add-on
- 1/2 cup (100 gram) raisins
Instructions
- Preheat the oven at 180ºC and leave the raisins in lukewarm water for 10 minutes.
- Add all dry ingredients to a food processor and run into a fine meal.
- Remove the meal from the food processor and add all wet ingredients, run into a smooth and lump free mixture.
- Add the dry ingredients to the smooth mixture and run the food processor again to fully combine to two mixtures
- Drain the raisins and stir into the mixture with a tablespoon.
- Cover a baking tray with parchment paper and scoop with a tablespoon the mixture as dollops on the tray. Flatten the dollops into cookies and transfer to the oven. Bake the cookies in 25 minutes golden brown and ready. Enjoy!
Equipment Needed:
food-processor
baking tray
Conclusion
I hope you enjoyed my healthy snack recipes. If you liked this recipe, please share it with your friends.
Banana Pancakes with just 2-ingredients
These delicious banana pancakes are literally just bananas and eggs. Whisk these two ingredients and bake them on a frying pan on the stove. Delicious and quick to make.
Banana pancakes
Banana Pancakes of 2-ingredients
This recipe works perfectly for breakfast, lunch or dinner. It’s a great snack if you’re on the run. Just grab some fruit and a piece of bread and you’re good to go.
You will need:
• 4 large ripe bananas
• 2 eggs
• A small frying pan
• Some oil
• Salt & pepper
• Bread (optional)
How To Make Banana Pancakes
Step 1. Peel the bananas and mash them.
Step 2. Separate the egg whites and yolks.
Step 3. Combine both parts of the egg.
Step 4. Add salt and pepper to taste.
Step 5. Add the mashed bananas to the egg mix.
Step 6. Fold the egg mix into the banana mix.
Step 7. Heat up a frying pan over medium heat.
Step 8. Pour some oil onto the pan.
Step 9. Spread the batter evenly across the pan.
Step 10. Bake until golden brown.
Step 11. Remove from the oven and let cool down before eating.
Serve warm with butter and honey.
Enjoy!
If you enjoyed this please let us know.